We cannot stress enough the importance of having a Google My Business account for brick-and-mortar businesses. It is true that running a traditional business is getting tougher with every passing day due to the demand for online and digital businesses.
However, physical stores and shops still make up the dominant part of the corporate world. in an era of digitalization, it is absolutely evident that you create a digital presence for your business. Even if you have a small physical store, it is crucial to add it to the Google My Business listing.
Google My Business listing helps traditional businesses attract the right audience through the online world. If you are running a brick-and-mortar store, the traditional promotional and marketing techniques are not enough, you have to incorporate the digital techniques, and Google My Business is the best place to start.
When setting up a Google My Business Account, many people struggle to add multiple locations to their business listings. So, you have a business located in more than one location, how will you add all the locations to your Google My Business account? Well, it is easy!
Table Of Contents
How To Add 10 Or More Locations To Google My Business Account
Step 1: Sign in to Your Google My Business Account
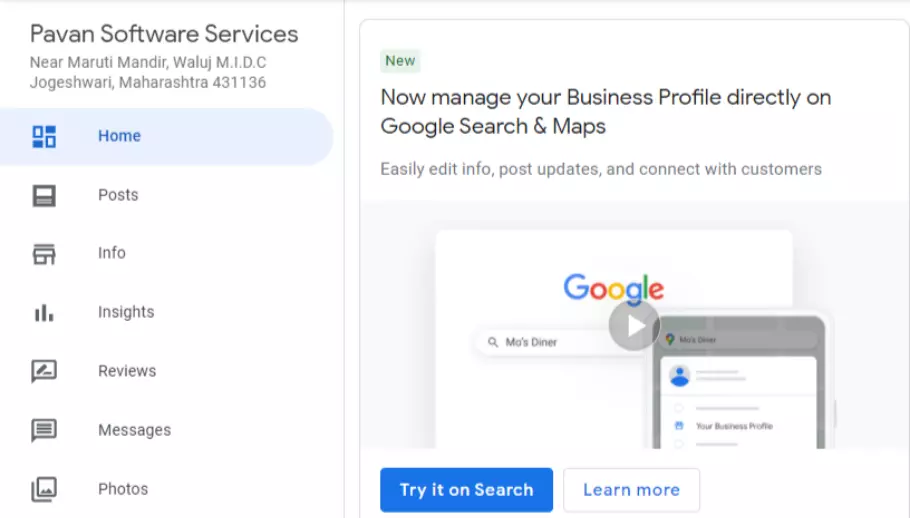
The first step of the process is to navigate to the Google My Business website. When you are on the website, enter the credentials to sign in to your Google My Business account.
Step 2: Click On the “Businesses” Menu
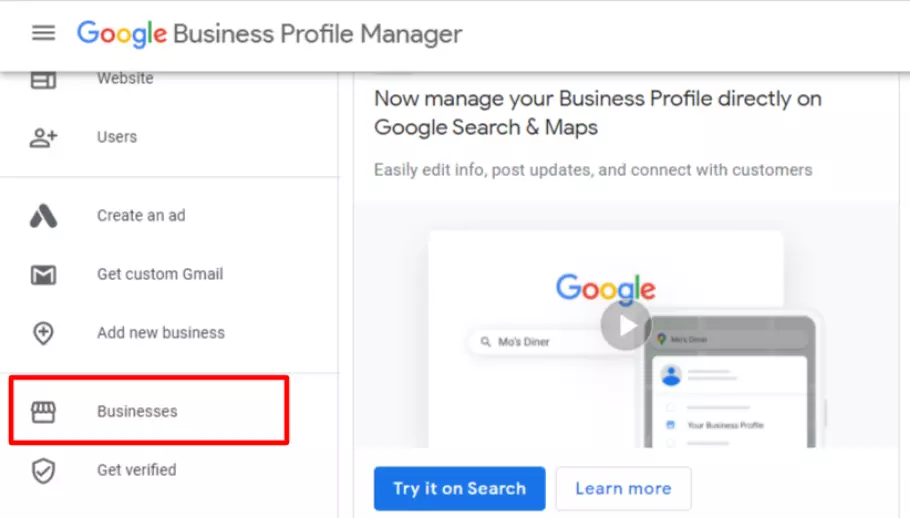
Once you have logged in to your Google Business account, Then you need to click on the “Businesses” Menu.
Step 3: Click On “Add Business ” Dropdown Menu
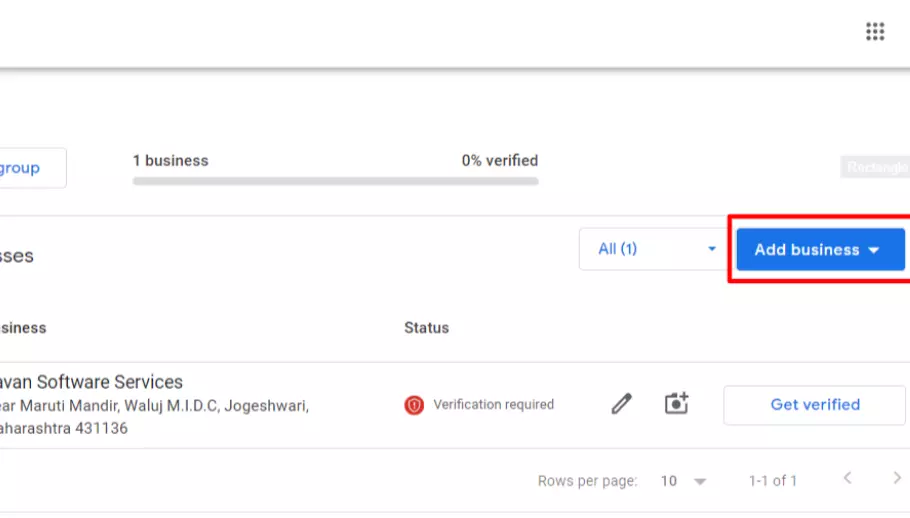
Now Click On the “Add Business” Dropdown Menu
Step 4: Click On “Import Businesses”
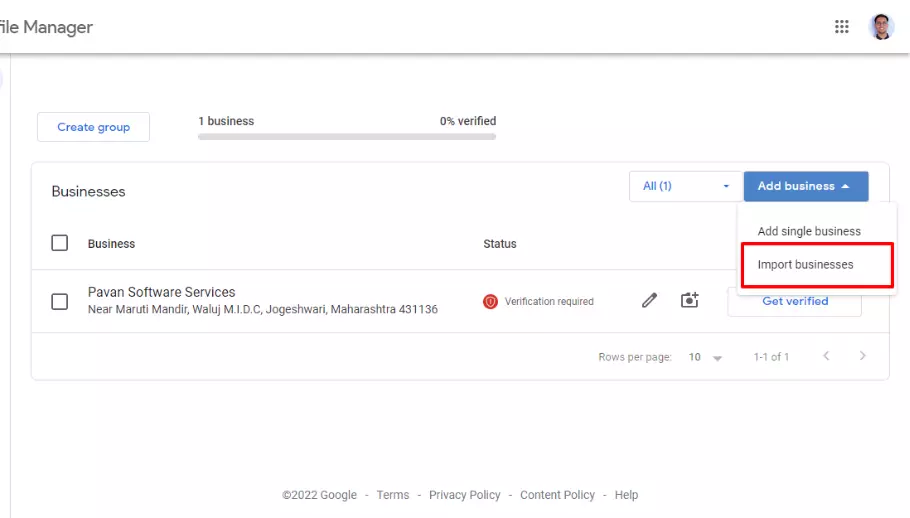
Now you need to click on “Import Businesses”
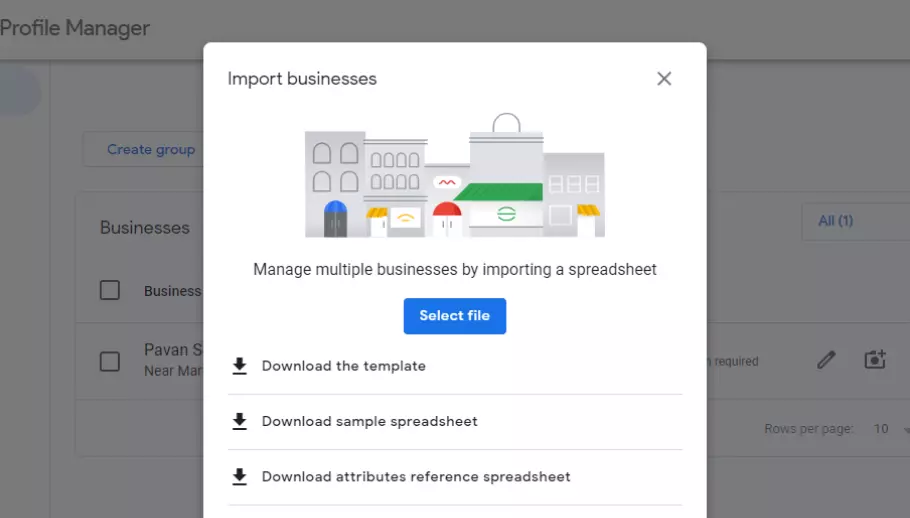
Step 5: Download The Given Template And Fill All The Details Properly
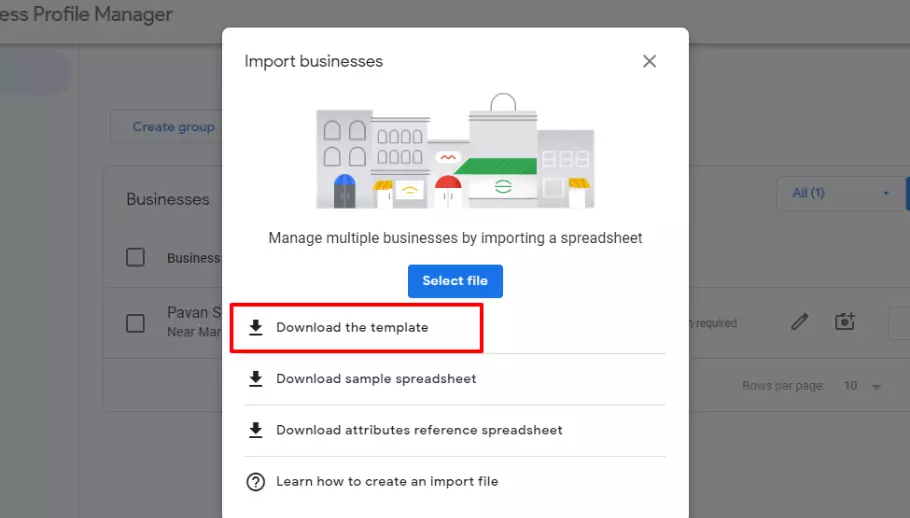
Download this given template. You can download it .csv OR .xlsx Format Also.
This Template Contains the Following Points:
- Store code
- Business name
- Address
- Locality
- Administrative area
- Postal Code
- Latitude
- Longitude
- Primary phone
- Website
- Primary category
- Business Hours
- Labels
Step 6: Select A File And Upload It
Step 7: Verify the Locations
After you have uploaded the file, you have to verify all the locations of your business. You can do it all in one go using the “bulk verification” option. On the top right side of the screen, you will see the confirmation icon. You have to click on that icon and then fill out the verification form. The process of verification can take up to seven days.
Also Read: How To Add Labels In Google My Business Listing
How useful was this post?
Average rating 5 / 5. Votes: 1
No votes so far! Be the first to rate this post.

I am the founder of Citation Builder Pro. I have been in the SEO and content marketing industry for 15 years and have a lot of experience in public relations and online marketing.
I started Citation Builder Bro to help businesses of all sizes create high-quality citations for their websites. My team and I are dedicated to providing our clients with the best possible services.

